


I thought this would never happen, but I am finally posting my 2016-2017 classroom tour! I always have big plans to take all my classroom photos and post them at the beginning of the year, but the never ending back-to-school to do list seems to get in the way every time. I think I'll just blame it on island time. ;) Anyway, hope you enjoy this little tour of my classroom!

Here is the view from my doorway, looking towards my classroom library:

Here is a closer look at my classroom library. I love this area of the room and the kids do too!

All of the color in this area makes my teacher heart happy. My book bins are from Steps to Literacy. The bins on the shelf to the left hold our leveled fiction books and the bins on the smaller shelf/reading bench hold our nonfiction books (see picture below). Both shelves, the two saucer chairs, and my lamp are from Walmart. The little table is a family antique that I spruced up for my classroom last year and the chevron rug is from Overstock. (It is from the Mohawk Home brand, but I am not sure if it is still available.) The tassel banner on the small bulletin board is from Schoolgirl Style and the welcome banner is from Teacher Created Resources.

One of my favorite additions to my classroom library this year is this huge Dr. Seuss quote! I used my Silhouette Cameo to cut it out of vinyl. This made it much easier to put up on the wall. I can't imagine putting up a huge quote like this letter by letter. The font is KG Next To Me Solid. I printed the Melonheadz clip art poster-size, then cut out the pieces, and taped them together. Schroeder Shenanigans in 2nd has a tutorial for this if you're interested in doing it in your classroom.

This is a close up of our classroom rules. They are free (and editable!) from Lucky to Be in First. I bought some cheap black frames from Walmart to frame them and they fit perfectly on the window sill. The throw pillows in my saucer chairs came from Target.

The photo above gives you a closer look at the main bookshelf in my classroom library. I found the wooden READ letters at Michael's a few years ago and spruced them up with paint and washi tape. The quote inside the frame is part of a freebie chalkboard set from Khrys Bosland and the book bin labels are from A Cupcake for the Teacher. The Officer Buckle craftivity that is on display is from Caitlin Clabby at Kindergarten Smiles.
To the left of that shelf are my new display shelves, which are actually IKEA spice racks! (If you frequent Pinterest, you'll know this is definitely not a new idea, but it's something I've always wanted to try out in my classroom.) I bought these little book buddies from Amazon and decided to display them here. I love how this little area turned out! (Well, except for the fact that the top shelf should probably have been a few inches lower. haha. Hopefully I can lower it at some point.) The plan is to switch out the books throughout the year, although as you can see, I kind of dropped the ball on that in the midst of the beginning of the year craziness. #oops.

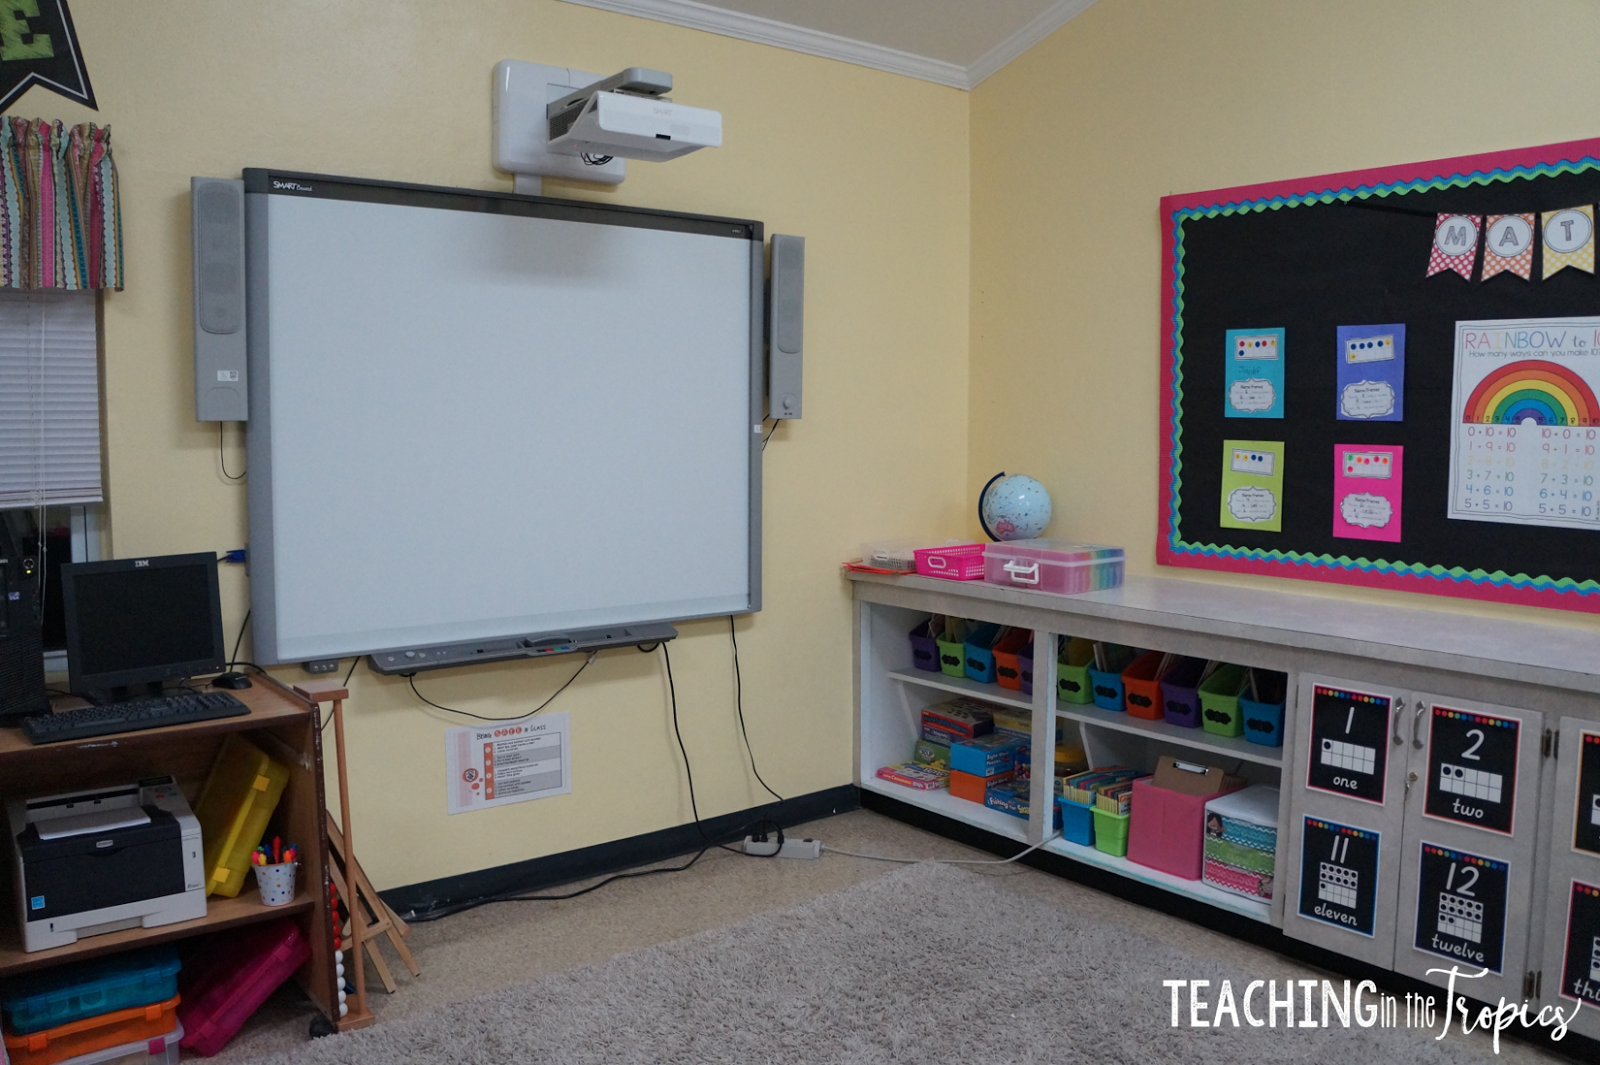
Moving to the right of my classroom library, you'll see my computer and Smart Board. If you follow me on Instagram, you'll notice I don't usually post pictures of this area of the room because all of the cords and wires drive me crazy! This is where we meet for Math lessons, but my students also love to use this rug (from Amazon) during independent reading, writing, and other times during the day. We keep our book boxes on the top shelf of the built-in shelving and the bottom shelf is used to hold word work games, chapter books, clipboards, and writing journals.
If you looked at my classroom pictures from last year, you'll notice my counters and cabinets are different. They were recovered this summer and I love the new look! In this photo, you can see more of the west wall. This wall is pretty much all bulletin boards and cabinets. To maximize space, I put my number posters on the cabinets.

I love this wall in my classroom! I had the pennant banners (from Target) up from last year, but this year I decided to add the "Be" quotes under each set of banners. I cut the letters from Astrobrights paper using my Cameo. It turned out even better than I expected and makes such a statement in the room! If you do not have a Silhouette or Cricut and would like to make these quotes for your room, you can check out my Be Brave Be Kind Be You Decor Kit in my TPT store.
The picture below gives a much better look at this area. This is obviously a picture from the very beginning of the year, but I included it anyway since it was the best one I had of this wall.

I made new number posters this year and love how they stand out against my light cabinets! I have them posted in two different font styles (and also with a white background) in my TPT store if you are interested. The banner on my bucket filler board is from From the Pond and can be found here.

I ordered these paper baskets from Really Good Stuff and they have been such a lifesaver this year! They help to keep my dreaded paper piles under control and my students have even caught on to using them! (For example, the student passing out papers knows any extras go in the extras bin and they know to turn in their work in the turn in bin.) These are a mix of the Neon and Rainbow sets. I made the basket labels to match my number posters. An editable set can be found here.
Moving further along this wall, you'll see a full view of my Writing board. This is where our Writer's Workshop anchor charts go. We just finished our first unit and are about to start narrative writing, so I cleared the board to make room for new charts. This little table serves a variety of purposes in our classroom. It's not only a Writing center, but is also used by my assistant to work with individual students or as a cool down spot by students who need a break.

Last year I had my Writing Center choices on the actual bulletin board, but this year I decided to display them under the board to make more room for anchor charts. This little chalkboard pencil from Target was the perfect addition to this area! I cut the words from white vinyl using my Silhouette Cameo and stuck them right on. I love how the pencil points to the writing choices and adds a cute touch to the area.

The writing choices (and the Write pennant banner) are from Seusstastic's Ultimate Writing station pack, which can be found here.
Just under my Writing board, near my door, you'll see our brag tag display. I started brag tags mid-year last year and used a bulletin board to display them. While this was really cute, I wanted a more functional way to display them without sacrificing bulletin board space. These are two racks from Walmart that are screwed in side by side. I used die-cut chalkboard pieces from Hobby Lobby to cover the area above each hook. The best part about this solution is that my students can easily reach their brag tag necklaces now, whereas before, I had to help some students reach their necklaces on the bulletin board.

Let's zoom out on the south wall in my classroom. This is what you see when you stand at the large shag rug by the Smart Board. The paper lanterns are from Oriental Trading. I hung them with black ribbon and tied bows to add a cute look (inspired by KinderCraze).

A little closer... The paper fans are a new addition this year and are from PomLove on Etsy. I love the pop of color they add! In the middle of the paper fan display, I have a chalkboard quote that I bought at a local store. It says "Speak the truth even if your voice shakes." :)

In the picture above, you get a better look at my small group table. I don't have a desk, so this little table does double duty. It is a wooden table but I covered the surface with chalkboard contact paper from Walmart. The stools are the same ones from last year (from IKEA), but I decided to spray paint them this year for an extra pop of color.
On the left side of this wall is the inside of my classroom door, which is decorated with this awesome quote from Maya Angelou. Last year, my door was white and boring. I knew I wanted to spruce it up this year and I love how it turned out! If you want to find out more about how I made this display, check out my blog post here.
Edit: Since this post was written, I have created a decor kit with the quote and circles to make it easy for you to re-create in your own classroom. If you would like to find out more, you can view the product here.

To the right of my door is my helpers bulletin board. This board displays my classroom jobs. The display from Amy Groesbeck and can be found here. The banner is also from Amy's store. You've probably noticed by now that I've used them on almost all of my bulletin boards!

Underneath this bulletin board, I have backpack hooks for my students that are labelled with their numbers (labels from Creative Teaching Press). Yes, I only have 11 students. :) One of the perks of teaching on a small island!
Moving on to my area of the classroom! Since I don't have a desk, this space holds a lot of my supplies and materials. I love all the color in this area! On the window sill, I have my "hello" sign from Target and some tissue paper flowers in vases. I wasn't planning on putting them there, but I found those cute little vases in a local shop and just had to find some way to use them!

Here is a closer look. The 10-drawer rainbow cart is from Walmart and mostly holds materials for Guided Reading. Last year, I didn't have labels on the cart and it became a little bit of hot mess. This year, I removed the knobs from the drawers and used Miss West Best's editable labels to help me stay more organized. I also have my teacher toolbox (labeled with Teach Create Motivate's editable labels), and my daily bins for Guided Reading (from Steps to Literacy). I made the days of the week labels to match the other black and brights decor and have an editable set available in my TPT store. On the bottom shelf, I have my fabric drawers that were included with the shelf (from Walmart) and those hold various Math and Literacy games, art supplies, extra school supplies, etc.

This year I added these Sterilite drawers to hold my daily copies and extra subject copies. The labels are from Learning in Wonderland's Let's Get Organized bundle on TPT. The pails resting on top hold some supplies that I wanted to have easy access to, such as scissors, anchor chart markers, guided reading wands etc. I believe all of the pails came from the Target Dollar Spot. Hanging above the drawers, you'll see my pencil sign from Tallahassee Sunday. I love it and my kiddos refer to it whenever they need to spell my name!

Here is a better look at this corner of the room. The door in the picture is for my closet. I painted it with chalkboard paint too, but haven't added anything to it yet due to the limited space with the vents. I am thinking I will have my kiddos sign their names on it with chalk to celebrate their sight word mastery or something similar. Above the door is my "It's time to learn" clock from Mardel. Who says clocks can't be cute? ;)

This shelf holds my monthly read alouds and a few other items. I labeled the bins (from Really Good Stuff) with chalkboard labels and put them in order from September to June. It has been so helpful so far to have all my read alouds organized and within reach! The bottom area of the shelf is used to hold smaller supplies (in the mini drawer set), my brag tags and reward coupons, and some binders.
Above the shelf, I have some more chalkboard accents. The two signs next to my phone are from Jo-Ann's. The four mini chalkboards are actually wooden plaques from Michael's that I painted black. I printed our school rules (based on the acronym SAFE) and modpodged them to the plaques so that we would have them to refer to each day.

This little area is another happy spot. :) The shelf holds our whiteboards and Math manipulatives (labels from Amy Groesbeck). On the top, I have more of Khrys Bosland's quote posters in frames, with a bouquet of tissue paper flowers in the middle. I ended up adding confetti to the vase to hide the flower stems and love the colorful and whimsical look it adds. The blue polka dot board is from Hobby Lobby and holds all the notes from my little sweeties. :) I found an Astrobrights circle banner kit at Walmart over the summer and decided to add a small one over the board to tie in with the color scheme.

This is a look at the front wall in my classroom. The board on the left was originally a green chalkboard, so I covered it up and it now serves as a word wall. The magnetic board makes it super easy to add words and allows students to borrow words to write them if necessary. My alphabet posters are from Miss Giraffe and the calendar set on my whiteboard is from Teacher Created Resources.

You'll notice in the picture above that I've added large Sterilite drawers and caddies this year. I am stuck with desks for now, but wanted to keep my students' books and basic supplies in a central location. I spray painted the drawer frames green, blue, and pink to match my table colors. The supply caddies are from Really Good Stuff. I spruced them up with a curly ribbon bow from Michael's and Amy Lemons' free labels. The matching bowls on each group of desks are used as our tidy tubs and hold our paper scraps during cutting activities. Those came from a local store.

This year I decided to move my bucket filler message center from the plastic shoe hanger. I bought some s-hooks and ordered new buckets from Oriental Trading. The hooks hang perfectly on the ledge and it has been so convenient to have the buckets at the front of the room! The posters under the buckets are from Rulin' the Roost's Bucket Filler pack.

Our learning objectives are displayed in frames under the word wall and white board. It is super easy to write on the frames with a dry erase marker! The blank subject posters are from True Life I'm a Teacher. Underneath our learning objectives is our Marzano scale (from Alma Almazan), which we use to assess our learning.

A view from the other side. The pink, green, and blue containers (from Michael's) hold calendar pieces. If you look closely, you can see they are actually attached to clips on this rainbow chevron thing (from Target). This idea originally came from Teaching is a Treasure on Instagram.

Right next to my whiteboard is our birthday display from Cupcakes 'n Curriculum and our hand signal posters. The hand signal posters were a freebie from Jessica Travis at Wild About Firsties a few years back, but are no longer available. However, she has a new free set of hand signal posters in a different design, so check those out if you are in need of some.

I originally ordered this little table from Walmart as a Writing Center table a few years ago. But as you can see, it ended up being much shorter than what I expected. I have put it to use a little supply station of sorts. It works perfectly because the kids can reach everything easily. You have probably noticed my pencil buckets are in a sad state. haha I am still wondering where all those pencils have gone! (The sharp and dull labels are a freebie in my TPT store if you are interested.) I labeled the mini Sterilite drawers with Learning in Wonderland's labels and am using them to hold extra crayons. This has been such a lifesaver this year because all those misplaced crayons now have a home!

And that wraps up the tour! Whew! I did warn you that there would be a lot of pictures. :) I hope you enjoyed looking at my little home away from home. Let me just say that my first year of teaching, my classroom did not look anything like this. It took several years to bring this vision to life! At the end of the day, a nicely decorated classroom is not the most important thing, but it is something I genuinely enjoy doing and gets me excited about going back to work after the summer. What I love the most about my classroom are the eleven sweet kiddos I get to share it with each day! They love our bright and colorful learning space as much as I do and we truly enjoy being here every week!
Thanks for taking the time to go on this little tour with me! I tried to include links and sources for most of the products and decor, but please feel free to leave a comment if you have any questions!


